Saturday 14 July 2012

really cross with myself

 thank god Friday the 13th has gone..... started off OK 
then went pear shaped  big time but wont bore you with that
does it get better NOPE!!!
 i have been itching to share some
 new soon to be launched stamps from Sheena Douglass
 Silhouette  of the Highlands
launch date
Wednesday 18th  on create and craft  at 8 am and 12 noon over on idea world
 2 stamp plates i have to say  they are beautifull 
the rub is....
 forgot to take photo's...... had them all packed up and kept looking at parcel thinking what have i missed ? wasn't till later it hit me...... air was a tad blue i can tell you
 thank fully i have 1 ..... i did take a photo of 
 the stag 

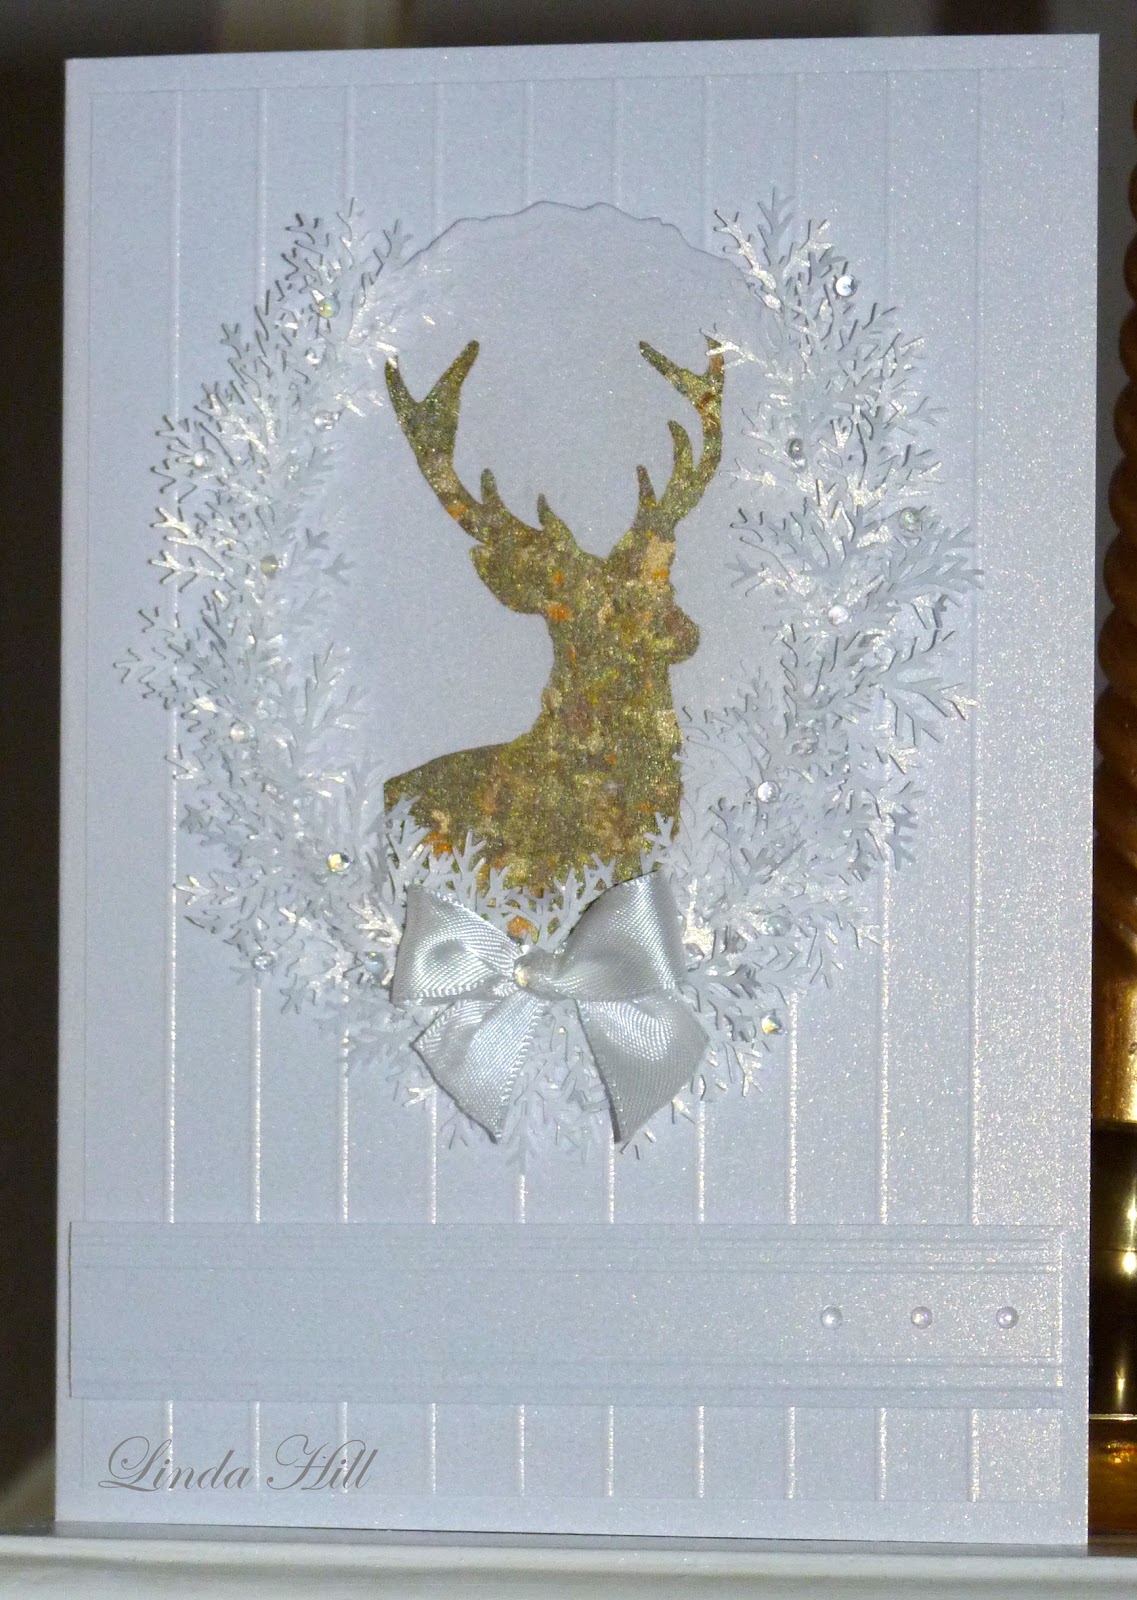
 i truly did have so much fun with these stamps this one i just love
i used indigo blu metal flakes on the stag 
 punched out the leaves from centrua pearl paper matted onto centrua pearl card 
with a few crystal gems  dotted here and there and a satin bow
  this stamp is so versatile   it could very easily be a card for Christmas weddings and stag nights or for that special man in your life  
you have no idea  how cross i am about no pictures to share  
have to say sorry to Sheena  she has yet again done a super job with these images 
they work perfectly with your  sprays misters inks  metal flakes just choose how messy you want to get
 the second stamp plate is  wild grasses  your going to love them too
check out the other DT samples there are some stunners or pop over to sheeana blog
i will go directly to naughty step 
promise boss i will do better next time
thank you for popping by today
hugs linda xxx

Friday 13 July 2012

Friday already

Good Morning everyone
  had a fantastic day with my grand daughter Sophia the weather was kind to us sunny and dry all day
we played out most of the time 
 I had to laugh at Sophia's version of hide and seek
  she told me where to hide before she started counting  lol 
 we had a pretend shop on the go and did jigsaw's played computer games  coloured in with crayons

i managed to get a bit more of my garden tidied too so all was good  
Got it all to do again today  but it's raining here this morning
so looks like we will have to  get out the DVD's and do a little painting
hopefully it might brighten up later 
so yet again no crafting for me till later 
 mind you i was totally shattered last night  after her daddy had picked her up 
goodness me  i need to bottle some of her energy  she is full of beans 
bless her 
what to be 3 again lol 
have a great day where ever you are normal  crafting will be resumed  soon 
hugs linda xxx

Thursday 12 July 2012

good morning crafters

 no crafting today 
 plans are all change for today and tomorrow 
Sophia  refused to go to playschool she was in floods of tears  was so upset this morning
when her daddy asked what was the matter she said wanted to visit me instead.....

which is lovely for me i really enjoy spending time with her
so no grown up crafting  for me till later today now sat watching Cbeebies oh pure bliss....

we are off out in garden soon to cut the grass it's a lovely day here
i have had a pretend coffee and play cake already very good for the figure lol 
would you all like some  She love playing pretend shops.
have a great day everyone catch you all later 
hugs linda xxx

Wednesday 11 July 2012

Template and tutorial for letter rack

Sorry in advance for the long post
 i had no idea how to explain how i made my
 letter rack
P1050126

this example is made from A4 card with 2 letter slots
if you want to make a 3 slot letter rack  like the picture above you will need 16" x 16" Card

FROM A4 CARD STOCK
YOU WILL NEED
5 A4 pieces of card scissors  dies stamps decorations of your choice and wet glue
i used Collall all purpose glue
from
Crafters Companion

CUT 2  pieces of card  7" x 11-3/4" for front and back panels
CUT 2 PICES OF CARD 2" x 11-3/4" for side panels and score full length at 3/4” in on both pieces
if you use a die to shape the top as i have done
you will have to adjust the side panels accordingly i rounded the corners on mine .
and CUT to fit you can use any large die shape


 i have used paper for this tutorial   

print out the image below for  letter compartments cut out 2
P1050129
i decorated my pieces before i assembled  with patterned papers
it was far easier that way
Assembly of letter rack
Step 1
P1050130
i have used  double sided tape for this tutorial
wet glue is recommended
place glue on bottom flap  1 on inside and one on reverse side of top  compartment
glue compartments in place 1 at a time
Step 2
P1050133 
attach the bottom compartment to base of you front wrapping the flap to the back
turn it over and place little pencil marks either side of your compartments  at the straight edge
this will give you a guide line where to place the second compartment
Step 3
P1050134
the second flap gets stuck down directly onto you front panel
Step 4

P1050135
now place glue on the inside of your thin tabs wrapping round as in picture
and attach to the back of front panel do this on both sides
Step 5
P1050137
place glue down full length of 3/4 section of your side pieces
attach to  back side of you front panel on both sides
Step 6
P1050139
now glue the triangle part  of your letter compartments to your side panels
as in picture
glue your  back panel over the backside of your front panel to hide all the joins and neaten up your letter rack
decorate till your hearts content….
for 3 slot letter rack you will need 16" card stock  
the width on all pieces stay the same through out

i hope i have explained it clearly enough 
for you to try it your self
 if your not sure cut out the pieces from copy paper first and follow the steps of the assembly
it's not hard to do just darn hard to explain...

if you do make one and share on net or your blog
please be so kind as to link back to my blog
http://lindasrainbowcraftingcabin.blogspot.co.uk/
Please do leave me a comment
i love to read  all your comments
thank you for popping by
hugs linda x

Tuesday 10 July 2012

Christmas Letter Rack


i had this idea in my head for a while so yesterday i thought i would try and make one 
what do you think to my old fashioned letter rack ?
we had a wooden one at home years ago.... sorry picture is dark but it was very late when i got a picture that was half decent
all made from Centrua Pearl Card  and my Spectrum Noir’s

 P1050126 P1050127
i had the LOTV image already stamped so decided to use him
the papers are from Nit Wits distressed with Tim Holts inks  large snow flakes were cut on my E craft
all glued together with Collall all purpose  and 3D glue
dies from spellbinders / Go Kreate
flowers ribbon and gems are from my stash
here are the Spectrum Noir Colours i have used
IG1- IG2- IG3- GB3- GB5- GB7- GB9- EB6- EB8- CG1- CGH2- CG3- CR10- DR3- DR5- DR7- Blender
thank you for popping by today
hugs linda xxx

Monday 9 July 2012

getting sorted for Christmas

made this card the other week

using one of my favourite stamps and my

Spectrum noir pens

from Crafters Companion 

P1040917

coloured the satin ribbon in to match with my pens

base card is Centrua pearl as is the fancy oval die

snow flake cut out on E craft

some 3D gel for dimension  thank you for popping by today

hugs linda xxx

Sunday 8 July 2012

Linda Ravenscroft Stamp coloured with Spectrum noir pens


sat colouring  in while watching
Wimbledon do do tennis but it is the men’s final
good job i love colouring lol..
P1050108
i have had great fun colouring this image
i love Anemone's
it’s just started to rain  here again so much for the sunny day
never mind all is good it’s tea time soon …..oh dear rain just knocked out the TV signal
thank you for popping by this evening
hugs linda xxx

Sunny Sunday

what a lovely day we have here.... no rain !!!
yippee... had a few hours with my mum yesterday sorting out her garden for her
and today
 had a visit from my grand daughter that’s why im late posting today
i have been colouring with my spectrum noir pens  from Crafters Companion
and a stamp i got few weeks ago
from Linda Ravenscroft

P1050107
I really enjoyed colouring her in
just got to add few highlights with  white gel pen on rain drops
then she can go onto a card
thank you for popping by today
hugs linda xxx