Monday, 15 December 2014

Mum's Christmas card with E brush Background

where has this year gone?
im late again making family cards
 i always feel better when i have got 
Mum's card finished Phew!
 so here it is


For my background i used  my Spectrum Noir BGR2
in the E-brush  all over the centura pearl card stock  with small swirls
then ran it through 
the A4 embossing Snow flake folder from as 
it's very subtle  i only wanted to tint the card stock as my wreath was all white 
 then set to  using  my dies cut my flowers and a paper punch for the fine branches

 those Die cut flowers had a coat of stick and stay then glittered 
 im hooked on that now ....
  as i was assembling the wreath it needed some thing extra to fill in the gaps
 so i raided my bean bag for the tiny  Polystyrene balls
 laid them onto some sticky card and  sprayed them with 
pearl diamond i used the 3d gel tacky glue and all purpose for my card
 but have to say
that bean bag  saved the day   lol
 added my bow and a few crystal gems   to finish off

 thanks for popping by today 
 hugs linda x


Sunday, 14 December 2014

Spectrum Noir with E-brush day two

Hi there  Crafters
  im sharing a few of my samples
using my 
Spectrum Noir and the E-brush
brought to us 
by 
  this card i wanted to show how you can mix Different colours that would never blend in pen form and 
i didn't create mud .......Big thumbs up
Texture paste Stencil from Barbara Grey Pebeo black gesso ,Pebeo gold gilding wax and my Spectrum Noir Pens
Big thumbs up  for altered art

Back ground with just 1 Spectrum Noir pen using a Mo manning digi image and a mask
 i adore the softness and the intense colour this was achieved by adding layers and adjusting the height of the E-brush another big thumbs up

Masks from copy paper and Die cuts
 for this card i used Centura white card stock every element was coloured with my Spectrum Noir Pens and the E-brush
 big thumbs up 
 honestly i had the time of my life with the Ebrush  
  have to say  a big thank you 
to 
Crafters Companion and Craftwell 
for yet again another fantastic product
 hugs linda xxx


Spectrum Noir meets E-brush

 did you managed to catch 
 Leann  from Crafters Companion Friday and Saturday
over on create and craft
with the 
Spectrum noir and E-brush

 just loved the effect she shared on the show with the Glittered card and E-brush
so  i decided to play 
 i grabbed my Spectrum Noirs and plugged in my E-brush
using a spellbinder mitten die and Tim Holtz Stencil
 here's what i came up with


   i followed Leann's instructions
 sprayed  the die cut with 
Stick and Stay 
then sprinkled on some crystal glitter
  added the Tim Holtz  stencil and started to e- brush the mittens
with my Spectrum Noir Pen  PL3
 oh boy do they sparkle when the light hits them
 my stencil moved so some area's  on the mittens did blur a-little
 but hey i had fun playing 
it's no big deal for me i can live with a few blurred edges in my life lol


   also used the 
Crafters Companion 
Snow flake  A4 Embossing folder for my matting layer
with a stamped sentiment e-brushed edges with PL3
to tie everything together

  im really pleased with the effect
 the E-brush opens up a whole new side to my crafting Stash 
 it's a fabulous  piece of equipment  from Craftwell
 very easy to use
i enjoyed trying something new 
 thanks for popping by 
 Hugs 
 Linda xx


Sunday, 16 November 2014

Fizzy Moon meets Spectrum Noir Aqua Tints

Had a little painting session with this sweet 
Fizzy Moon Stamp
 and my
from 
Crafters Companionn

 the Tints are very Bright strong colours straight from the bottle
so i decided to do some mixing to make my own colours
i used colours from the Perfect Primary Essentials and Landscape
 the dark brown and the black really dull the colours down 
which is just what i wanted 
i think it worked 


only use the tiniest tip of paint on your brush when mixing your own colors 
they go a very long way
 i used lots of layers to get the depth and dimension 
but it didn't take too long to dry in between layers with them being small areas
the stamp image it's self is only 2"x2"
so with that in mind i went for CAS
 I scored the 4"x4"centura pearl base card on my Big Score cm side

 matted and layered with mirri and Centura card
using the  Tacky Glue and 3D gel
 i then added Wink of stella Clear 
for that touch of Sparkle

im quite pleased with how it turned out 
so why not try mixing your own color pallet with your 
Spectrum Noir Aqua Tints

 thanks for dropping by 
 hugs Linda x


Saturday, 1 November 2014

Sheena Douglass with Pebeo Aqua tints and Stamps

Hi there everyone
 im so late today sharing my samples 
using the brand new stamps from 
Sheena Douglass  

here is the Hydrangea
and the 


 it is the first time i have played with the Aqua tints  and i have to say  they are  beautiful to work with
when the stamps arrived i knew straight away  
i wanted to  do a canvas 
the Hydrangea is the perfect size for an 8"x 8" canvas to give  impact
 i also used the texture paste and Sheena's Stencil of the Eiffel tower
 once it was dry i gave it a coat of white Gesso all over
 then started adding the colors from the Aqua tint pastels set once i was happy with the color blends
gave that a quick blast with heat gun then  stamped in my leaves and flower heads 
i then filled in the leaves with the green from the set  and left to dry
 while that was drying 
i used some Crafters companion water color card
with all the colors from the Pastel set
made some backing papers so that i could stamp then decoupage the leaves and flowers
 the Pastel set  are a little sneaky 
they are beautiful in there wet form but dry slightly darker ....crafty or what lol .
anyway  after it was all dry i used 3D gel to start decoupaging my flowers
 to finish off i added crystal gems to the center of each petal just for that bit of bling
  the Aqua tints are water based so will re activate if they get wet
 i decided to give it a coat of Pearl Diamond  to protect it  and seal everything 
had so much fun with this canvas and Sheena's new stamps

 i will be sharing more sample 
 so please do drop by soon 
 hugs linda x


Friday, 31 October 2014

Happy Halloween

 OK I'm GUILTY
it's been for ever since i last blogged
 life has just got in the way as it does some times
 but never the less i have still been crafting
 i  decided to make a Halloween card 
using the Brambly Hedge stamp from  Crafters Companion 
he was crying out to be turned into a vampire  ready for 
 halloween
 using my Spectrum Noir Pens and Pencils
 Crafters Companion black card stock for the coffin shaped card 
embossed with the 8x8 A stitch in time folder
 with a light application of silver gilding paste  to highlight the watch faces
 i used a white pen for spider web then added wink of stella  for that bit of sparkle
 i hope everyone has a Happy Halloween
enjoy and stay safe 
thank you for dropping by 
 hugs linda x

Wednesday, 2 April 2014

I'm back

Hi there crafters 
what a few weeks i have had
caught cold on top of cold laid me out flat i can tell you for a few days

im feeling a lot better now thank goodness
just got to get rid of the cough that seems to be lingering

still been busy with samples i hope to share soon 
but i thought i would share a card  that i made using some  Pebeo Iridescent paints
and my new Gorguss stamps 
and of coarse my 
Spectrum Noir Pens and Pencils


i first stamped the image then masked it off
to apply the paints on the background the shimmer is just yummy once dry 
it went through my ebosser with the spellbinder die thank god for that machine
don't have to do anything just switch it on lol
hard to get a good picture  it's dull here and shimmer on back ground make it glare in full light
 colored the image with my Spectrum Noir Pens and Pencils 
 i then matted onto some brown mirri
matted onto a layer of Centura Pearl card that i embossed with my Swirl embossing folder 
from 
 here are the colors i have used

Pen Colors TN1-TN2-TN3-FS3-FS8-CR3-CG3-IG4-IG6-IG9-TN6-OR1-OR3
Pencil colors 120-014-057-053-020 blended with Sansodor

 thanks for popping by 
hugs linda 

Tuesday, 25 February 2014

have you heard

Sheena Douglass 
has had her paper and pencils out again
are you ready for even more fabulous new stamps
launching this Thursday  over on 
Create and craft
 now if you like Mystery these will be right up your street
 there are 3 sets of themed stamps 
and 
 a sentiment stamp which is so versatile
so here are three samples to share
i have been very busy so terribly late with my 
sneaky peeps sorry for that,

colored with spectrum noir
matted and layered onto an embossed  layer with the rose 
embossing folder  die cut and rolled the roses made from the backing paper
with a touch of glitter on the windows
such a pretty stamp  i do like it alot

 the next two cards  
are using stamps from the sentiment stamp plate

 i hope you will agree
 the sentiments make totally different cards
would fit any occasion
 more sneaky peeps tomorrow 
 thank you for dropping by 
 hugs linda xxx


Tuesday, 14 January 2014

Two totally different effects

  had a delivery of some new stamps today  
from LOTV only ordered them 
Yesterday Lunch time 
fantastic service.....

so i had to try them out
yep !!!
my Spectrum Noir Pencils  from
 were out 
 so why not used those lol 

  thought i would try to show 
 the same image and same color pencils
Two different effects 


the bottom image
 i blended out the colors  using Light Medium and Dark Pencils
with blending fluid and paper stump  exactly the same technique as when using pens
the top image 
 i laid down a base layer all over the image with my lightest pencil color then with very sharp points on my Medium and Dark Pencils 
using little flicking strokes randomly following the contour of the image to fill in the area

 you really can get some Fabulous effects 
with 
The Spectrum Noir Pencils

  thank you for dropping by today 
hugs linda xxx

Monday, 13 January 2014

Birthday card

Goodness me where has the day gone
I'm very late today  had a me day just relaxing
so as you might already know 
the Spectrum Noir Pencil 
from 
Crafters Companion
sold out at the CHA show
 how fantastic is that 

  while preparing all my samples i had to make 
a birthday card for my son
so had to be Bebunni 
apart from the fact i had already got it stamped out 
 my son loves Cake!!! lol
 this is done with a combo of Spectrum Noir Pens and Pencils

 simply matted and layered onto core-dination 
 a backing paper from a Nit wit collection i had already got printed out
 and dew drops to finish
 while making the card i  wondered how the  SN pencils would behave on 
Centura Pear card ???
 so i stamped  and set too coloring 

  all i can say is 
They behaved as i knew they would
Centura pearl card has a lot of tooth and has a slight  grainy texture
it just grabbed the color and blended a dream !!!
i used Layering for this little test piece
this means Direct to card  coloring is another big plus
 for those who like to do clean and simple cards
using the  Spectrum Noir Pencils 
  thank you for dropping by 
 hugs linda xxx


Sunday, 12 January 2014

Spectrum Noir Pencils on Kraft card

hi there crafters
 i do hope your all keeping warn 
 we had a very hard frost come in over night  
flip it's cold here .. 
when i got up it looked like my first card im sharing today out side 
Chilly is not the word lol 

did you catch our Leann  from Crafters Companion
and the fantastic 
Premier of the 
Spectrum Noir Blendable Pencils

i sat glued to the TV what a great show
 as i said i have put these pencils through there paces 
experimenting on all different  types of card stock
 kraft card is so popular what a great way to test them !
  i don't normally use Kraft Card so this was a challenge for me 
did i have fun oh yes!!!
 it can be very hard to totally block out the base card color
but not with these beauties
take a look


 this is using the fabulous Sheena Douglass stamp 
 with the Spectrum Noir Pencils and Blending Fluid on the  buildings 
on the roofs that is the White pencil on it's own 
now that to me shows the quality of these pencils 
you are able to get a good coverage with  these pencils
the falling snow is white Pebeo acrylic paint


this one  is using the layering technique 
where you use a light -medium- and dark to get dimension  
 i hope you can see how well they blend
 to a smooth seamless  finish
 i added the tiniest touch of white acrylic paint to the snow then on his wellies for the shine
and finally


 just couldn't resist making a card with this image 
he tickles me  every time is see his expression  go on admit we all feel 
at some point over the festive season a bit frazzled  and grumpy
i know i do 

i used  a blender pencil to blend the colors together 
  i hope i have been able to show you 
 these pencils work brilliant on Kraft Card
 thanks for dropping by today 
 hugs linda xxx


Saturday, 11 January 2014

Blendable Pencils hit the screens today

 Are you ready to see 
the LIVE Link
with 
Leann from
Crafters Companion 
Presenting the
Spectrum Noir Blendable Pencils

 I have really put these pencils through there paces
hope to share  over next few days my results
so here is
my card for the big day

Spectrum Noir Pencils on Vellum

 they blend a treat on vellum give you a lovely soft effect
im very happy this means i can now flip images for gate fold cards with the SN pencils
happy days

 i used some Neenah and a small piece of core-dination to mat the Vellum onto to
 then ran some pink centura pearl card  
with the  Crafters Companion Rose Embossing folder 
through my Ebosser 
layered onto silver mat card added the dew drops with a tiny touch of cosmic shimmer on the flowers for that bit of sparkle

 don't forget if you can tune in at 4pm
over on Create and Craft for the live link
 hugs linda x

Friday, 10 January 2014

The Buzz word is B in Spring

This coming Spring
2014


are bringing yet another 
Fabulous Product to the Crafting World 
I know your going to love them as much as i do

 The Spectrum Noir Blendable Pencils

Leann  will be Introducing the New Pencils at 
the CHA
over in the USA  
This Saturday 11th at 4pm UK Time
 with a live link to the Create and Craft Channel
 how great is that ! 
so as you can imagine i got to play with these beauties early 
im so darn lucky i caunt tell you 
it's been a true pleasure it really has
 they are a fantastic product to work with
i have done a couple of toppers using the SN Pencils on there own 
and
Spectrum Noir Pens along side the Spectrum Noir Pencils

so here we go 
this Bebunni image is colored with Pencils 
they blend together beautifully 


This one
 I have used Spectrum Noir Pens as a base layer
them colored on top with The Spectrum Noir Pencils 
 they really  make the image pop
 makes your colouring even more vibrant


if you would like follow the link below 
it will take you to the

where you can read all about the Spectrum Noir Blendable Pencils 
at your leisure
 I do hope you will try and tune into Create and Craft 
to see Leann live Tomorrow
im going to be tuning in 


thank you for dropping by today 
Hugs linda xx


Wednesday, 1 January 2014

New Year Crafting Project

IT'S 2014
 Hope you all have a wonderful year
i spent the holiday with my family
 had a super time
 while out one day with son and grand daughter
we collected some leaves which gave me the idea for this art project
so new year's eve arrived and i set to trying to get the idea out of my head

 i had no idea what i was aiming for
 but hey
that's the best part just go with it and see where you end up
i had great fun and as ever made a mess

 I'm pleased with the result
 first i made a stencil from the original leaves
then went to town with my acrylic paints and  ice silk
  love that stuff it looks like a watermark when painted onto a plain surface
 the 3 top leaves  are sponged in a slightly darker shade to the ones on the background

i then added veins with my quickie glue pen and foil flakes
they didn't stand out enough from the background
so i gave them a coat of spray and shine quickly covered with
micro beads it's hard to see in the picture but when you see them in real life
they look like velvet  the leaves were stuck in place with 3D gel from
Crafters Companion
 brilliant stuff held firm straightaway

so here is my first crafting project
 for
2014
my new 12"x 12" altered canvas
something different to fill a corner

i hope you all have a smashing time crafting in 2014
thanks for dropping by today
hugs Linda x


Thursday, 12 December 2013

More Sea Life with Sheena Douglass

Hi there Crafters
 more of the beautiful stamps 
from 
Sheena Douglass
 two card  hopefully showing they will fit any style of cards


i created a backing paper using  my Gelli Plate the stamps the Silks from set 1 and the brown fusion acrylic paint 
did some heat embossing on the top with clear and holographic powders
 the topper was coloured in with Spectrum Noir pens
BT1.BT2, BG1 and Blender pen 
onto Centura pearl card 

my second card could not have been more simple
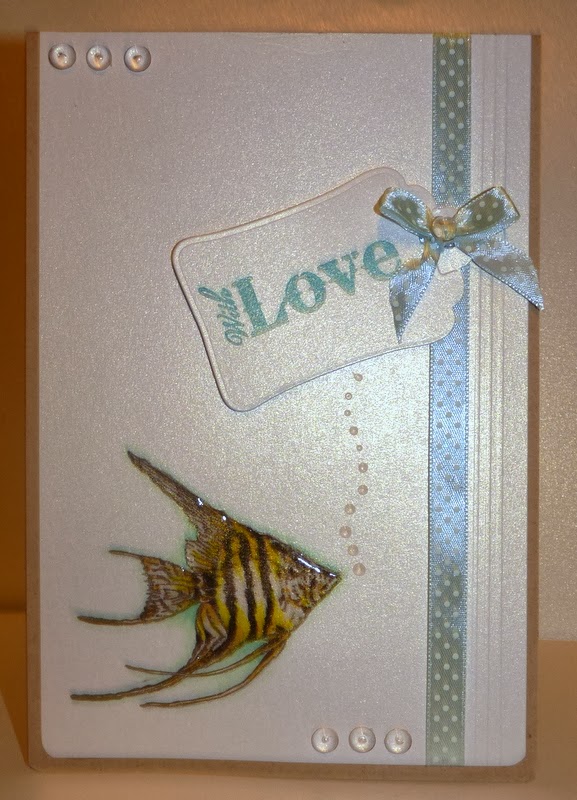
stamped and coloured with Spectrum Noirs
embossed lines and some Glossy  accents on the fish added a few bubbles
leading up to the sentiment matted onto 
Crafters Companion Kraft Card

off to colour some more 
catch you all later
hugs linda x

Wednesday, 11 December 2013

Sea Life with Sheena Douglass

Hi there crafters
 there are some stunning 
stamps coming soon
from our Sheena
 Sea life 
 over on Create and Craft
Friday 13th at 10 am
there are 2 A5 plates in this collection

 i just love this stamp

i stamped out the image then heat embossed 
went in with distressing inks and even more embossing powders  once i was happy with the background i added the distress inks to the sea horse added frantage to finish off
the backingpaper was made using lots of layers embossing powders and stamps

well after that i had to make a candle

i embossed the image then applied it to the candle painted in the back ground
using silks from set 1 i then painted the sea horse with spiced tomato from set 4
the seaweed is one of the solid stamps from this set
 i cut them out added the ribbon flowers and gems  
it was very hard to get a half decent picture but boy in real life that seahorse does sparkle
i will hopefully be sharing more tomorrow

 thanks for popping by today 
hugs linda xxx

Monday, 2 December 2013

Decorating Candles with no need to wrap

Hi there crafters
i have been experimenting 
with candles again
and to be honest with you im blown away!!!
 the magic is 
Stick and Spray 
from 
yes that's right no kidding
i did get good results heating the candles with a wrap
of greased proof paper but holding it in place was a nightmare
it kept slipping which you don't want 
  
so today i got out my candles
stamps embossing powder  and played...
i did 6 candles in just under 12 minutes got quite a little production line going on lol
everyone perfect no runs no pitting or dimples
It's so darn easy 
with the stick and spray
 i have taken some pictures of each step  
in case you might like to try it for your selves

Step 1
heat emboss your stamped image onto tissue paper

Step 2

 cut around your image not to close keeping your edges curved if you can to get a softer effect
Flip over your image over give it a quick light blast of Stick and Spray
 you don't need a lot a fine mist will work brilliantly

there is no rush it will stay tacky for quite a while
just let the spray agent evaporate  like you would if you use if for stamping

Step 3


place your image right side up onto your candle and smooth out with your finger tips
you can re-position at any time as i said no rush 
make sure there are  no bubbles or creases in the tissue paper
and heat set the image
Making sure your heat gun is moving at all times

you will clearly see the wax melting through the tissue 
you move to another area

once it was all done  but still warm
i rolled the candle onto some grease proof paper to make sure all the edges were in cased in wax
but really i didn't need to 
as i said everyone worked perfectly
here is the finished candle ready to decorate
 honestly do try it with the stick and spray 
Brilliant stuff 
Magic in my eyes
your able to hold the candle while your heating too
 with the greased proof paper i felt i couldn't see the wax clearly melting  
this way you have no fear of that it's happening there right in front of you
  i had no problems heating the image that had the stick and spray onto my candle
no fumes or any such thing at all

i was in full control at all times doing it this way 
 didn't feel like that using the greased proof wrap that's for sure
i do like to be safe when im crafting

 here is one of the other candles that  i made this morning 
decorated all ready to give as a gift


PS: just added a picture of the Stick and Spay
you need
 i type in the wrong product name  earlier
so sorry
 don't want to miss lead anyone 
thank you for dropping by
 hugs linda xxx


Thursday, 28 November 2013

Nanna Said

hi there crafters 
not been too well for few days caught a nasty bug 
 feeling a lot better now i felt like crafting.

what a laugh !
 i wanted decorate some candles for Christmas so i gathered all the things i needed  it looks blooming easy when you watch others well i landed up doing a jig trying to keep my hands away from the heat gun and hold a candle at the same time needless to say
first one was OK-ish!!!!! cough cough...


 i wasn't going to be beat by a candle.
 but i could see my small stash of candles going out of the window after the first attempt
so i asked a few of my crafting buddies for some tips 
and as ever they came up trumps. 
off i trot to get sorted once more

i decided to make some keepsake ones for my grand children

 colored them in with my
 Next Generation Spectrum Noir
that was novel 
first time i have colored onto tissue paper they didn't bleed at all
  in fact they behaved very very well in deed 
i was impressed

 so here's my finished candles


 special message for Santa on the reverse 
he can't argue with this message 
im sure
created the message in craft artist and printed it out onto tissue paper
thank goodness for Stick and Stay   
it held the tissue paper firmly to paper while it went through the printer
and stayed tacky enough to allow me to place on the candles
perfect for this sort of thing

here are the SN colors used 
GB6,GB8,GB10,BG1,BG2,BG3,OR3.DG3,CR11,DR6,TB3,TB5,BP4,BP7,IG6
,IG9,EB4


i think i could get used to this candle crafting
 it's fun once you get the hang of it
 note to self ....
must stock up on more candles

thank you for dropping by 
hugs linda xxx


Tuesday, 19 November 2013

Little card using New Spectrum Noir Pens

Had a little coloring session with 
the New Spectrum Noir Pens
from 

  really enjoyed coloring this digi
from Aurora Wings
it's been a nightmare trying to get a half decent  picture 
the light is shocking at this time of year


 a  plain layout for this card 
black and gold metallic card onto a 6"x 6" centura pearl card blank
here are the colors used
TN1,TN2,FS1,FS8,HB1,CR2,CR3,CR4,CR5.CR7,EB1,EB2,
CG2,DG1,DG3,GG2,CT1,CT3,TB7,TN7 TB3,TB7,BGR3

thank you for dropping by today 
hugs linda xxx

Monday, 18 November 2013

Next Generation Spectrum Noir Pens

Hi Crafters 
well i have been Coloring with my 
New Spectrum Noir Pens

  they are truly a pleasure to work with
they really are im totally in love with them  
the newly formulate inks blend even better if that can be possible 
well i can say  Yes they do !!!
double locking lid and the new Brush nib
the soft grip is great very comfortable feel love that  
the finer nib really does get into very tight area's

so what have i been making
i decided to make my Mums Birthday card

Along Side the Fantastic Next Generation Pens 
I used  Centura Pearl card Embossing folder 3D gel and Tacky glue
from 
 Some die cut boarders and Frantage

The Spectrum Noir Pens Used 
TN1,TN2,FS1,FS8,EB1,EB2,GB1,PP1,PP2,PP5,PP6,HB1 and Blender pen

thank you so much for dropping by

hugs linda xxx